Knot · Beginner · 14 min
Double half hitch: drawing a line with cord
Two half hitches tied in the same direction make the one knot that can draw a straight or diagonal line anywhere in a macramé piece. It is how circles get closed, shelves get levelled and diamonds get their edges.
Published 2 Sep 2026 · · 3-ply twisted cotton 3 mm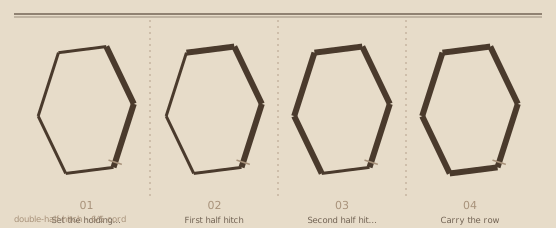
At a glance
- Kind · Knot
- Level · Beginner
- Working time · 14 min
- Cord · 3-ply twisted cotton
- Thickness · 3 mm
- Sample · diagonal row of 12 hitches
- Finish · last hitch pushed flush against the row above
Set the holding cord
Pin the holding cord at the angle you want the finished row to follow. Every hitch will take its direction from this one line.
First half hitch
Bring the working cord over the holding cord, then behind and up through the loop. Pull snug but not tight.
Second half hitch
Repeat the same movement in the same direction. Two hitches make one unit that will not slide along the core.
Carry the row
Work hitch after hitch down the core, keeping each pair pushed against the previous one so the diagonal stays a clean line.
What one unit actually is
A double half hitch is two identical half hitches worked in the same direction onto a holding cord. The first hitch holds the second in place; the pair then grips the core and cannot slide. On a 3 mm cord a single unit measures about 6 mm along the core, so a 12 cm diagonal row takes roughly 20 units.
The angle comes from the holding cord
The row will land exactly where you pin the holding cord, so pin it first and knot second. For a 45 degree diagonal on a 20 cm wide piece, anchor the holding cord one knot group in from the edge and 20 cm down. Tying the row and then trying to pull it into a diagonal will only make the hitches bunch up at one end.
Left-facing and right-facing
The direction of the wrap decides which way the little ridges face, and mixing them in one row produces a visible seam. Pick a direction for the row and keep it: right-facing hitches for a line that travels left to right, left-facing for the mirror. The ridges should read as one continuous barber pole along the finished line.
Closing a circle
To make a round shape, work the hitches around a core that curves, adding one extra unit every four or five to let the row turn without gaps. Nine units around a 6 cm circle is comfortable; fewer than seven and the outer edge will show daylight between hitches.
Cord cost of one diagonal row
Only one working cord travels the whole row, so a diagonal is cheap in cord count and expensive in length. Each unit eats about 4 cm of that single cord on a 3 mm cotton, which makes a 20 cm diagonal of 26 units a 105 cm commitment. Cut 120 cm and keep the spare: a diagonal that runs out eight units from the end cannot be extended, only unpicked. If the row feeds into a gathering row below, add another 25 cm because the final units bunch together and each one then uses closer to 6 cm.
Where it goes wrong
- Working the two half hitches in opposite directions, which gives a loose pair that slides along the core.
- Not pushing each pair against the previous one, leaving a ladder of gaps along the diagonal.
- Pinning the holding cord after the first few hitches, so the start of the row points the wrong way.
Check before moving on
- Each pair of hitches reads as one compact block with no gap between them.
- The completed row is a straight line without steps or waves.
- The holding cord is invisible from the front except at the very ends.