Knot · Intermediate · 12 min
Berry knot: a bead made out of the cord itself
Three overhand knots worked in one loop produce a small dense ball on a single cord. It is the cheapest way to add punctuation between rows without adding beads, and it uses nothing but the cord already in your hands.
Published 5 Oct 2026 · · 3-ply twisted cotton 4 mm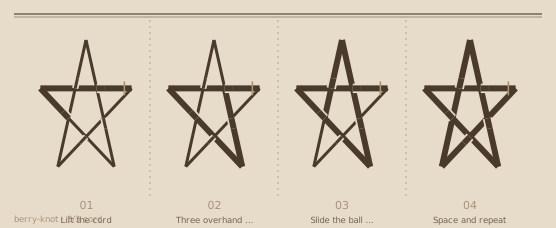
At a glance
- Kind · Knot
- Level · Intermediate
- Working time · 12 min
- Cord · 3-ply twisted cotton
- Thickness · 4 mm
- Sample · 3 berries spaced 4 cm apart
- Finish · berry pushed up against the row above
Lift the cord
Decide how big the berry should be. A 3 cm berry needs about 9 cm of cord lifted out of the line.
Three overhand knots stacked
Push the lifted cord into a loop and tie an overhand knot in it, then tie two more in the same loop so the knot becomes a dense ball.
Slide the ball up
Slide the stacked knot up the cord until it sits against the previous berry or the row above, then tighten the standing cord.
Space and repeat
Leave 4 cm of plain cord between berries. The bare cord is what makes the berry read as a bead rather than as texture.
Sizing a berry
Berry diameter comes from how much cord you lift out of the line: 9 cm of lift gives roughly a 3 cm berry on a 4 mm cord, and 12 cm gives 4 cm. The relationship is close to linear, so scale the lift by a third for every extra centimetre of diameter you want.
Stacking the knots
The ball is three overhand knots worked in the same loop, each one pushed hard against the one before. Tying them loosely and then tightening all three at once gives a lumpy, lopsided berry; tying each one fully before starting the next gives a clean sphere with visible ribs.
Spacing and rhythm
Berries almost always look better with bare cord on either side: 3 to 5 cm of plain cord between them, and at least 2 cm before a row of square knots. A berry immediately against a knot row disappears into the texture and reads as a mistake rather than a design choice.
Where berries work
Use them as the stem nodes on a macramé flower, as the intermediate stops on a hanging cord so a pot can be set at three heights, or as a decorative row across the bottom of a wall hanging. On a plant hanger, three berries at 6 cm intervals make a genuinely useful height adjustment rather than a purely decorative one.
Berries as height stops on a hanger
On a plant hanger the berry is the cheapest adjustable stop there is. Space three berries 6 cm apart down the central cord and the pot can hang at three fixed heights without untying anything: with a 15 cm pot, berries at 6 and 12 cm below the wrap give hanging heights of roughly 67, 61 and 55 cm from the hook. Because the berry is a ball rather than a flat knot, it also stops a sliding ring cleanly instead of letting it creep down over a week. Work the berries before you tie the base wrap, or you will be tying them with a pot hanging in the way.
Where it goes wrong
- Pulling the berry tight before all three overhand knots are in place, which traps cord and limits the size.
- Working berries hard against a knot row so they merge into the texture.
- Cutting the lift too small and getting a berry the size of a pea that reads as a lump.
Check before moving on
- The berry is round when viewed from the front and not creased on one side.
- Berries along a cord are within 3 mm of each other in diameter.
- The standing cord runs straight through the berry without a kink.